
How does a simple motor work?
Scrape the insulated wire with sandpaper provided.
Materials
One AA (1.5-volt ) battery
Pre-cut insulated Copper wire
Pre-cut PVC pipe
2 Magnets
2 safety pins
1 rubber band
Sandpaper (to clean the insulation from the ends of the wire)
How do I begin?
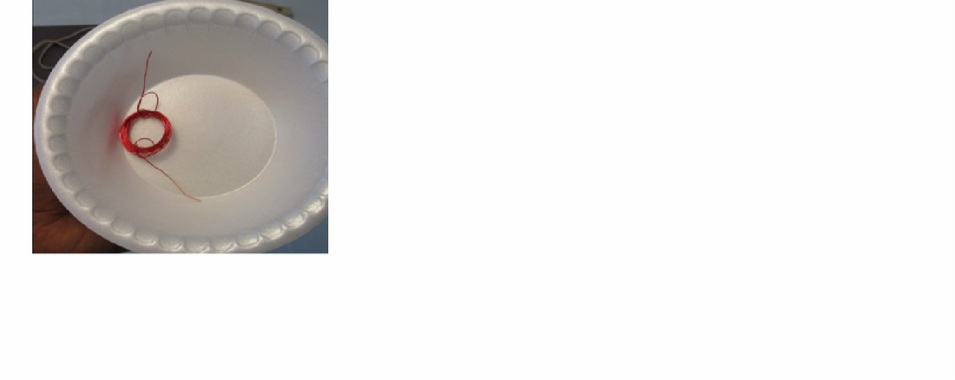
1. Straighten the Copper wire. Wind it tightly on the PVC pipe. The loops of the wire should be adjacent to one another.
2. Remove the coil and tie the wire by making a loop and a simple knot. The two ends of the coil should jut diametrically outwards to ensure symmetry and even distribution. The coil will rotate on these two ends.
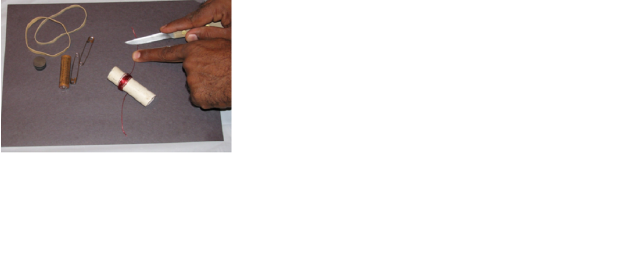
3. Now, scrape the enamel from all sides of the end leads using a knife or sandpaper provided. The enamel will remain only on the bottom of the end leads. The copper / enamel sequence leads to the make /break of the circuit.
4. This open lead is the heart of this simple motor and allows for electricity to flow.
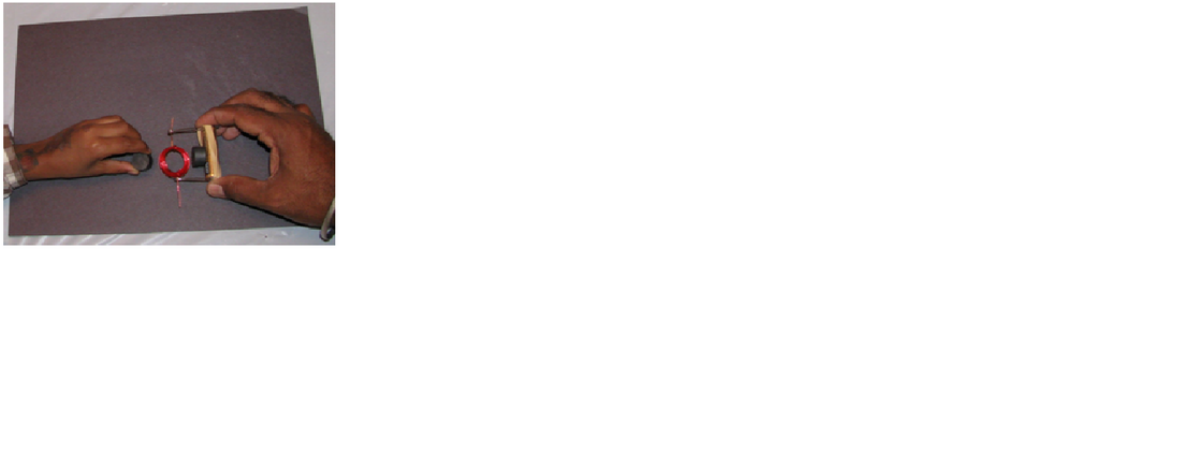
5. Place the Magnet provided at the center of the battery as shown in the image.
6. Tie a rubberband to the ends of the battery and insert the safety pins top first leaving the circular end open for the coil.
7. Insert the coil leads to the circular end of the safety pin. Ensure the pin is high enough to allow the coil to rotate freely while being close enough to the magnets.
What just happened?
You will notice the coil spinning or applying some pressure if the distance from the magnet is right and the enamels of the coil ends have been cleaned properly the motor will start spinning. You may notice an occasional spark at the time of contact. Do not leave the motor running for long periods as it will heat up.
One AA (1.5-volt ) battery
Pre-cut insulated Copper wire
Pre-cut PVC pipe
2 Magnets
2 safety pins
1 rubber band
Sandpaper (to clean the insulation from the ends of the wire)
How do I begin?
1. Straighten the Copper wire. Wind it tightly on the PVC pipe. The loops of the wire should be adjacent to one another.
2. Remove the coil and tie the wire by making a loop and a simple knot. The two ends of the coil should jut diametrically outwards to ensure symmetry and even distribution. The coil will rotate on these two ends.
3. Now, scrape the enamel from all sides of the end leads using a knife or sandpaper provided. The enamel will remain only on the bottom of the end leads. The copper / enamel sequence leads to the make /break of the circuit.
4. This open lead is the heart of this simple motor and allows for electricity to flow.
5. Place the Magnet provided at the center of the battery as shown in the image.
6. Tie a rubberband to the ends of the battery and insert the safety pins top first leaving the circular end open for the coil.
7. Insert the coil leads to the circular end of the safety pin. Ensure the pin is high enough to allow the coil to rotate freely while being close enough to the magnets.
What just happened?
You will notice the coil spinning or applying some pressure if the distance from the magnet is right and the enamels of the coil ends have been cleaned properly the motor will start spinning. You may notice an occasional spark at the time of contact. Do not leave the motor running for long periods as it will heat up.
Coil assembly

Final battery, magnet, and safety pin assembly
Motor spinning
